 All of us at Amy Cleaning would like to take this opportunity to wish Merry Christmas and a Happy New Year to the ever growing team of our cleaners, loyal clients and readers of our blog.
We will meet again in 2011!

 All of us at Amy Cleaning would like to take this opportunity to wish Merry Christmas and a Happy New Year to the ever growing team of our cleaners, loyal clients and readers of our blog.
We will meet again in 2011!
 With Christmas around the corner and dining tables covered with succulent turkeys and cakes it is easy to forget what your daily calorie intake should be or what is the meaning of the word calorie in general. To top that bloated next morning feeling, it is more than likely that you will have to wake up to a house full of dirt, leftovers and unwashed dishes. Don’t despair, you can make your house spotless and burn calories at the same time.
Begin cleaning from bathroom. Scrub the tiles with long sweeping motions. Exaggerate the movement up and down until you feel the burn. When scrubbing the bath get into the squat position and hold it. Keep yourself suspended to burn more calories. Get on your knees to scrub the tub, and use long motions back and forth to work the arms and shoulders. Shake the rugs outside up and down several times. Use round circular movements with your arms to clean toilet bowl and sink. Swing the mop out way in front of you making sure that your knees are bent to protect your back when sweeping the floor.
Hover taking long swift moves. If you feel even more festive, you can even do some dance moves while cleaning your carpets. Hover can be brilliant dancing partner, just don’t let your neighbors see you. Use circular motions for all the furniture when dusting and don’t be afraid to put some pressure where possible. This is great for firming the arms. When bending down to reach hidden places, take some time to do deep knee bends. Step up to the cob webs. Stretch on your toes or use a small ladder. Get the duster and step up, dust, step down and repeat.
Remember that half an hour session of hovering will burn between 75 and 125 calories, mopping floor-112 , cooking and food preparation-100 calories per hour, making beds-70.
So don’t rely on Brussel sprouts to get you through Christmas dinner, but explore the hidden gym in your house and you will be amazed at the results.
 A nice smell is the sign of a clean house. Read on how to determine where the bad odours are coming from, what to use to remove them, and how to prevent them from showing up again.
It is easy to eliminate bad odours if you know what is causing them and where they are coming from. It is trickier if you don’t. Leak in your refrigerator may cause metallic smell of Freon. Overfilled basket of dirty laundry in the bathroom, blocked pipes outside your open windows, kids sneaking in food in their bedrooms or dead mouse stuck between your floor boards can all be blamed for unpleasant smells.
Most deodorizers although popular only cover the smells, but do not eliminate them. Choosing the right type of cleaner with a touch of smell makes a big difference though, so do not discard these.
Lemon based cleaners eliminate bad smell and clean the kitchen. Grapefruit or orange cleaners tend to work best to break down the bacteria causing smells around the toilet. Use floral cleaner for the cigarette odor in the car or light an oriental candle to cover smells caused by pet stains.
Leave an open box of baking soda in your kitchen shelves-this will absorb bad smell and prevent it from spreading. If spray air freshener is not effective, try neutralizing odours by mixing it with one teaspoon of bicarbonate of soda and one teaspoon of lemon juice in two cups of hot water and use this as a spray.
As usual, the best way to eliminate odours is to prevent them in the first place. Change your kitchen cloths regularly, don’t overfill your bins or laundry baskets, deal with mildew in your bathrooms as soon as it appears and try to ventilate your house as much as you can, even during winter months.
 There are various greener and safer alternatives to bleach: vinegar, lemon juice, hydrogen peroxide, oxygen, borax, washing soda, sodium hydrosulfite (salt & water) to name a few.
Hydrogen peroxide is a very popular choice. It is that gentle that is even safe to use as mouthwash! (Please be aware though and do not purchase stronger than 3% for these experiments). To use as a household green cleaner, always choose 3% label. Put it in a spray bottle and use as all-purpose spray or bleach alternative in the bathroom. It will fight off mold and mildew just as well. You can also use it as disinfectant. Apply a small amount to a cotton cloth and wipe away surfaces.
Want to go even greener than that? Replace bleach with lemon juice. Add a cup of lemon juice to your laundry cycle for an extra whitening boost. Pour lemon juice over stains to use as stain remover then, rub with salt and leave to dry in the sun for several hours. If you want to remove stain from hard surfaces, apply mixture of lemon juice and baking soda and allow it to sit for several hours. If necessary, re-apply. You can also use lemon or its juice to sanitize. Do not use lemon for cleaning marble though as this can lead to etching.
Vinegar is very effective alternative to bleach in damp an mold infected areas as it also disinfects and prevents re-appearances.
Even if you are a strong believer of ready made cleaning products and not the ones that you have to mix, peel or would rather use in baking cakes, you can always buy bleach/chlorine free alternatives and protect yourselves and your environment.
Bleach has been used in households for ages and is still enjoying popularity amongst other cleaning products. In fact, some claim that it is irreplaceable. However recent studies and experiments proved that bleach is a very dangerous chemical and one that should not be used at all. Unfortunately, nowadays it is often used mixed with chlorine or sold under different labels.
Around a quarter of emergency calls from household accidents epicenters are chlorine and bleach related. While chlorine isn’t toxic to the body, the chemical reactions that often happen while using it produce extremely toxic products. These build up in the environment, cause dangers to the water supply, kill fish, harm animals, and enters our bodies through the food chain.
Bleach is also the cause of serious health problems. It is especially dangerous for people with allergies and asthma but can be the cause of respiratory problems, burned skin, and even damage to the nervous system. Often, the danger occurs not from the bleach or chlorine directly but from chemical reactions that occur when those are mixed with other products.
• Many people unknowingly mix chlorine with dish soap while cleaning the kitchen. This produces mustard gas, the same gas used to kill many people during World War I.
• Chlorine is also easily mixed with ammonia. The results of this cocktail is a toxic gas which may even stop lungs functioning in severe cases. Generally you will be able to see the fumes, but be aware as sometimes, they will remain invisible and you may not realize your are breathing in a potentially life threatening gas. We can carelessly create this reaction by mixing cleaning products or even cleaning toilet as our urine contains ammonia too.
• Chlorine also mixes with organic matter creating chloroform. This can happen in the house, while cleaning, but also outside of the house when mixed with organics in the environment. These reactions build toxin beyond your doors, neighborhood or even state borders.
There are always safer alternatives to bleach so follow our blog to find out more about this and for the time being, throw away that so familiar bleach bottle and turn away when you see it tempting you from supermarket shelves.
 We use our bathrooms everyday, therefore it is one of the most favourite places for bacteria to spread. Cleaning your bathroom should not be a hard work if done properly and regularly and you do not even need to invest in expensive products. You can do wonders by using the contents of your kitchen cupboard.
Bathtub. Give attention to your bathtub as you use it every day and so the right amount of time must be spent on cleaning it. Firstly give it a good rinse. If you have a shower curtain, remove it and wash it separately. Then sprinkle baking soda over the wet surface of the tub. The moisture from the rinse helps the baking soda stick to the tub. Use a stiff scrub brush to scrub the tub. The baking soda will form a paste with the water and act as an abrasive to remove mildew and stains. Scrub it off. Then dip a sponge with a green scrubby attached into some vinegar and continue scrubbing the tub. The vinegar is a disinfectant, and it will activate the baking soda to help remove stains even more. Rinse the baking soda and vinegar off the tub.
Cleaning a Bathroom Sink. It is important to clean sinks regularly to avoid spread of harmful bacteria.
Vinegar works wonders. Fill a small bucket half way with vinegar, and soak toothbrush holders, razors and razor holders, and anything else you keep on your bathroom sink that’s been covered with toothpaste, soap, and water spots. Vinegar descales and dissolves water spots and soap residues almost instantly. Soak the entire surface of the sink with vinegar using a sponge and leave for a little while, maybe 5 minutes. Scrub the entire surface of the sink from the top, down. There is no reason to rinse the vinegar off. Simply wipe everything dry. Scrub the items you’ve been soaking and dry them off without rinsing them in water as well.
Bathroom Tiles. Different tiles will need different products so always be aware and careful. For cleaning ceramic, porcelain, or glass bathroom tiles you’ll need soft sponge, vinegar in a spray bottle, salt, baking soda, lemon juice and warm water. Spray vinegar on the tiles and scrub with a damp sponge. There’s no need to rinse the vinegar away; it will evaporate and leave no residue or smell. If the tiles are still dirty, mix water, baking soda, and salt in equal parts. Rub this paste onto the tile with the sponge. When done, rinse out the sponge and use it to remove the paste residue from the tile. Then dip rinsed sponge in lemon juice and coat the tile. This will remove traces of soap and oils and make the tile look shiny. This also does not need to be rinsed off.
If you are cleaning tiled floors, simply mop the floor with soapy water and let it air dry.
 It is difficult to protect our furniture from scratches especialy in the households with pets, but you can remove the scratches without having to replace the piece. There are few special products for this, but as everywhere, there are also alternatives to them such as …nuts.
You will need fresh walnuts, nutcracker, clean cloths, crayons, iodine, household alcohol.
1. Crack open a fresh walnut to reveal its meat, using a nutcracker.
2. Rub the meat over the scratch, rubbing in the direction of the wood grain.
3. Rub the affected area with a clean cloth. Continue until the scratch starts blending with the wood. This method works well for light scratches.
4. Fill in a darker scratch with a crayon that matches the color of the wood and rub with a clean cloth until it blends in with the rest of the wood.
5. Apply iodine to scratches in mahogany, using a clean cloth. If you have a maple piece of furniture to repair, dilute iodine with household alcohol and cover scratches with the solution.
We are all familiar with term “spring clean” and surely everyone will agree that a deep clean is a must in each household at least annually. But how about preparing your house for winter?
Living in a region with changing seasons, like Britain where winters get cold, it is very likely that your home will be closed up all winter long therefore winter clean is just as important as spring clean. First reason is of course health. The second reason is because with the holiday season, you will most probably be a host to lots of parties. Last but not least, for most people Christmas season brings more stuff into the house; presents as well as dirt and germs. Clean now to prepare for these unwelcome additions and keep your mind at rest.
We have listed a few of the “musts ” for winter deep cleaning.
1. Clean your skirting boards. We always vacuum, steam clean our carpets, sweep and mop floors, scrub tiles…but often neglect the skirting boards. It is easy enough. First vacuum the area with your attachment, or rather the hose, then use a mild solution to wipe them down.
2. Clean the air vents. Those will give you unnecessary dust if neglected. Unscrew them from the wall if you can, remove, clean them well and put them back on. Makes a big difference. Remember you will have a sealed house for the winter and the heat on almost constantly.
3. Dust ceiling and freestanding fans. Dirty fans will blow dust around once heated so please pay attention to them. Turn the ceiling fan off, stand on a chair or small ladder, and wipe the blades down with whatever solution is appropriate for the material the fan is made of. Wipe the top of the blade, and not just the edges. Take apart a freestanding fan by unscrewing the cage around the fan if needed. Reassemble and resume use after cleaning carefully.
4. Vacuum your upholstery. If you have pets, perhaps you do this regularly, but for those of us who don’t, we sometimes neglect this. Take the cushions off after you vacuum those, and clean underneath.
5. Sanitize the trash cans. Scrub and rinse them inside and out. Doing this outside with the hose works well, if you’re still able to go outside and not freeze your fingers!
6.Twice a year (summer and winter), you should clean all of the mattresses in the house to keep dust mites under control. Vacuum the top of the mattress, move the mattress and vacuum the box springs, then flip the mattress and vacuum the new top of the mattress. For further protection add an allergenic mattress pad and wash your sheets in hot water.
Pay extra attention to humidity of your house. Perhaps it’s worth investing in humidifier now or using alternative methods such as bowl of boiled water. The air will get very dry with your windows shut through the winter and that heating on.
 Two cleaner’s of the month this time :Denise Vanessa Tulcidas
From S. L.: Vanessa did a great job in my flat yesterday –it was so nice to come home to everything sparkling!
and Sorina Violeta Hintea
From D. M.: I just wanted to write a quick note to say Sorina did a really great job last Thursday.
From S. B.: Last week’s clean went very well – hopefully Sorina will be ok on her own this week. We’re happy to work with her to get her settled in.
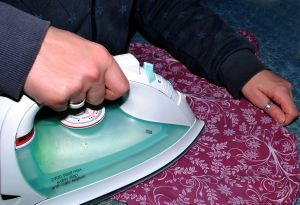
 We do not know exactly when people started trying to press cloth smooth, but we know that the Chinese were first to use hot metal for ironing. Pans filled with hot coals were pressed over stretched cloth thousand years ago and today the meaning of ironing is still growing with each day- new products being introduced, new tips and tricks being offered to achieve that perfect finish.
Good ironing equipment makes a big difference therefore invest in them and they will serve you long time.
There are lots of tips on ironing that you can find via the internet and these will be worth looking at as well if you want to change your ironing experience for the better, but we have listed some of the main one’s for you bellow:
• Move the fabric away from you not toward you as you iron, to avoid needless creasing.
• Improve the results of your ironing by reflecting more heat. Do this by putting a sheet of aluminum foil (shiny side up) between your ironing board and the ironing board cover. Alternatively, purchase a metal coated ironing board cover.
• Certain fabrics such as viscose, dark fabrics, acetates, and wash and wear fabrics in general, should be ironed on the reverse side to avoid giving a shine.
• One of the best money saving ironing tips is to make your own starch solution if you need to use a spray starch on certain fabrics. Simply dissolve 1 tablespoon of cornstarch in 2 cups of water, pour the solution into a spray bottle, and voilà, you have your own spray starch.
• Some ironing boards come with a sleeve board attachment, ideal for shirts and blouses. If you don’t have one, roll up a towel and insert it in the sleeve before ironing to avoid creases if needed.
• Some thick fabrics need ironing on both sides. Be sure to iron the inside first and the outside last.
• Take a moment to sort your laundry before starting to iron so you have a pile of garments needing low temperature and graduate to the garments needing a higher temperature, adjusting the thermometer on your iron progressively.
• Don’t iron dirty clothing or stained clothing. It can make it difficult to remove the stain afterwards as it becomes set in the fabric.
• After ironing shirts, put them on hangers and then fasten the top and center buttons. The shirt will then hang straight and your ironing efforts will last
• For large items like tablecloths or bed sheets, put layers of newspaper out on a large table, cover them with a sheet and place the tablecloth or bed sheet on top to iron.
• When choosing an ironing board, get one with a wide end. It is easier and quicker to iron on this extra surface with fewer strokes and doesn’t require moving the fabric so often.
• For shirts, iron them when slightly damp. If they have dried too much, spray them with a little water.
Ironed clothes plays a big part in how other people will portray you, therefore research, invest and enjoy your ironing experiences.